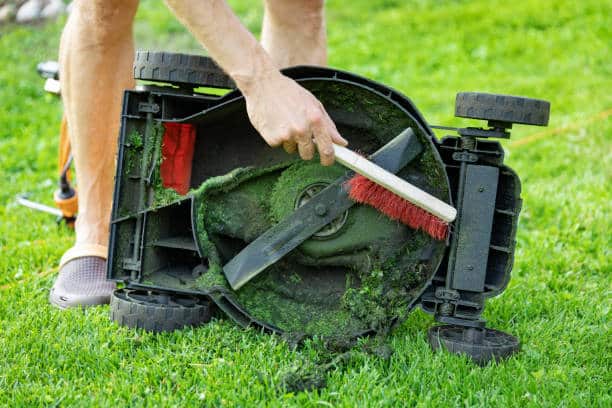
Learn how to change Toro lawn mower blades with ease. Elevate the mower, remove the old blade, install the new one, and test for proper operation.
Introduction
Importance of Sharp Blades for Lawn Health
Sharp blades are crucial for maintaining a healthy lawn. Dull blades tear the grass instead of cutting it cleanly, leading to a ragged appearance and increased disease susceptibility. Regularly changing your Toro lawn mower blade ensures a clean cut, promoting lush, green grass growth.
Overview of the Blade-Changing Process
Changing the blade on your Toro lawn mower may seem daunting, but it’s a relatively simple task that can be done with basic tools and a little know-how. This guide will walk you through the process step by step, ensuring you can tackle this essential maintenance task with confidence.
Preparing for Blade Replacement
Gathering Necessary Tools and Materials
Before you begin, gather the necessary tools and materials for the job. These typically include a socket wrench, a new blade, safety gloves, and potentially a block of wood or blade removal tool. Having everything on hand will streamline the process and prevent unnecessary delays.
Ensuring Safety Measures
Safety should always be your top priority when working on machinery. Before starting, ensure the mower is turned off and the spark plug wire is disconnected to prevent accidental starts. Wear safety gloves to protect your hands from sharp edges and rotating parts.
Accessing the Mower Blade
Elevating the Mower Safely
To access the mower blade, it’s crucial to safely lift it using a jack or ramps. Position the jack or ramps on a level surface and carefully lift the front or rear end of the mower, depending on the location of the blade. Ensure the mower is stable and secure before proceeding.
Securing the Mower to Prevent Movement
Once the mower is elevated, take precautions to prevent any movement or shifting during the blade replacement process. Wheel chocks or wooden blocks can be placed strategically around the wheels to stabilize the mower and minimize the risk of accidents. Additionally, engage the parking brake to provide an extra layer of security and stability.
Removing the Old Blade
Locating the Blade and Retaining Bolt
Slide underneath the mower deck and locate the old blade and the retaining bolt that holds it in place. Take note of the blade’s orientation and the position of the retaining bolt for proper reinstallation later. The retaining bolt may be located at the center of the blade or off to the side, depending on the mower’s design.
Using the Correct Tools to Loosen and Remove the Blade
Prepare the appropriate tools, such as a socket wrench, to loosen and remove the retaining bolt. Select the correct socket size that matches the bolt head to ensure a secure fit and prevent stripping or damaging the bolt. Apply steady, even pressure in a counterclockwise direction to loosen the bolt, then remove it fully by hand. Keep track of any washers or spacers that may be present on the bolt.
Inspecting the Blade and Mower Deck for Damage
With the old blade removed, take the opportunity to inspect both the blade and the mower deck for signs of wear, damage, or debris buildup. Carefully examine the cutting edges of the blade for nicks, bends, or dullness that may indicate it’s time for replacement. Inspect the underside of the mower deck for any accumulation of grass clippings, dirt, or debris that could affect cutting performance. Clean the deck as needed to ensure optimal performance.
Installing the New Blade
Aligning the Blade Correctly
Position the new blade onto the mower deck, ensuring it is oriented correctly according to your earlier observation. Align the mounting holes of the blade with the corresponding holes on the mower deck to ensure proper installation. Take care to position the blade so that the cutting edges are facing in the correct direction and parallel to the mower deck for even cutting.
Securing the Blade with the Retaining Bolt
Insert the retaining bolt through the center hole of the new blade and align it with the corresponding hole on the mower deck. Reinstall any washers or spacers that were present on the old bolt. Carefully thread the bolt into place by hand, then use the socket wrench to tighten it securely in a clockwise direction. Check the tightness of the bolt periodically as you tighten it to ensure it is snug and secure.
Ensuring the Blade is Tightly Fastened
Once the retaining bolt is tightened to the manufacturer’s specifications, give the blade a gentle tug to ensure it is firmly seated and secure on the mower deck. Avoid over-tightening the bolt, as this can cause damage to the blade or mower deck. With the new blade properly installed and secured, you’re ready to lower the mower back to the ground and resume mowing with confidence.
Lowering and Testing the Mower
Safely Lowering the Mower Back to the Ground
After successfully replacing the blade, it’s time to lower the mower back to the ground. Carefully remove the jack or ramps, ensuring the mower descends slowly and steadily. Double-check that the mower is stable and securely positioned on the ground before proceeding.
Reconnecting the Spark Plug
Before testing the mower, reconnect the spark plug wire to restore power to the engine. Ensure the spark plug wire is securely attached to prevent accidental disconnection during operation. This step is essential for the mower to start and run properly.
Testing the Mower to Ensure Proper Operation
With the blade replaced and the spark plug reconnected, it’s time to test the mower to ensure everything is in working order. Start the mower and let it run for a few minutes, listening for any unusual noises or vibrations. Engage the blade and test it on a small patch of grass to ensure it cuts smoothly and evenly. If everything sounds and looks good, your mower is ready for action.
Maintenance Tips
Regular Blade Inspection and Sharpening
To maintain optimal cutting performance, it’s essential to inspect and sharpen the mower blade regularly. Check the blade for signs of wear, damage, or dullness after each use. Sharpen the blade as needed using a file or grinder to ensure a clean, precise cut. Regular blade maintenance will prolong the life of your mower and keep your lawn looking its best.
Proper Storage and Handling of Mower Blades
When not in use, store mower blades in a clean, dry location away from moisture and humidity. Avoid placing heavy objects on top of the blades, as this can cause damage or distortion. Store blades in their original packaging or a protective sleeve to prevent accidental contact and injuries. Handle mower blades with care, wearing gloves to protect your hands from sharp edges. By following these storage and handling guidelines, you can prolong the life of your mower blades and ensure they’re ready for use when needed.
Conclusion
Changing the blade on your Toro lawn mower may seem daunting, but with the right tools and know-how, it’s a manageable task. From elevating the mower to safely lowering it back down, we’ve covered each step in detail to guide you through the process. By following these steps, you can replace your mower blade with confidence and ensure your mower operates at its best.
Regular maintenance, including blade inspection, sharpening, and proper storage, is key to keeping your Toro lawn mower in top condition. By taking the time to care for your mower, you’ll enjoy better performance, a longer lifespan, and a beautifully manicured lawn season after season. Make blade maintenance a regular part of your lawn care routine to ensure optimal mower performance and a healthier lawn overall.
FAQs
-
How often should I sharpen my Toro lawn mower blade?
Sharpen Toro lawn mower blades every 25-30 hours of use or as needed for optimal cutting performance.
-
Can I use a universal blade on my Toro lawn mower?
Yes, you can use a universal blade on your Toro lawn mower as long as it matches the specifications of your mower model.
-
Which way do you turn the bolt to loosen a lawn mower blade?
Turn the bolt counterclockwise to loosen a lawn mower blade.
-
How to sharpen Toro lawn mower blades?
Use a file or grinder to sharpen Toro lawn mower blades. Maintain a consistent angle and ensure even sharpening across the blade for optimal cutting performance.
-
How to change a lawn mower blade?
Elevate the mower, remove the retaining bolt, replace the blade, and secure the bolt tightly to ensure safe operation.
-
How to remove Toro zero-turn blades?
Lift the mower, remove the blade retaining bolt, and carefully slide the blade off the spindle, ensuring to follow proper safety precautions.


Leave a Reply