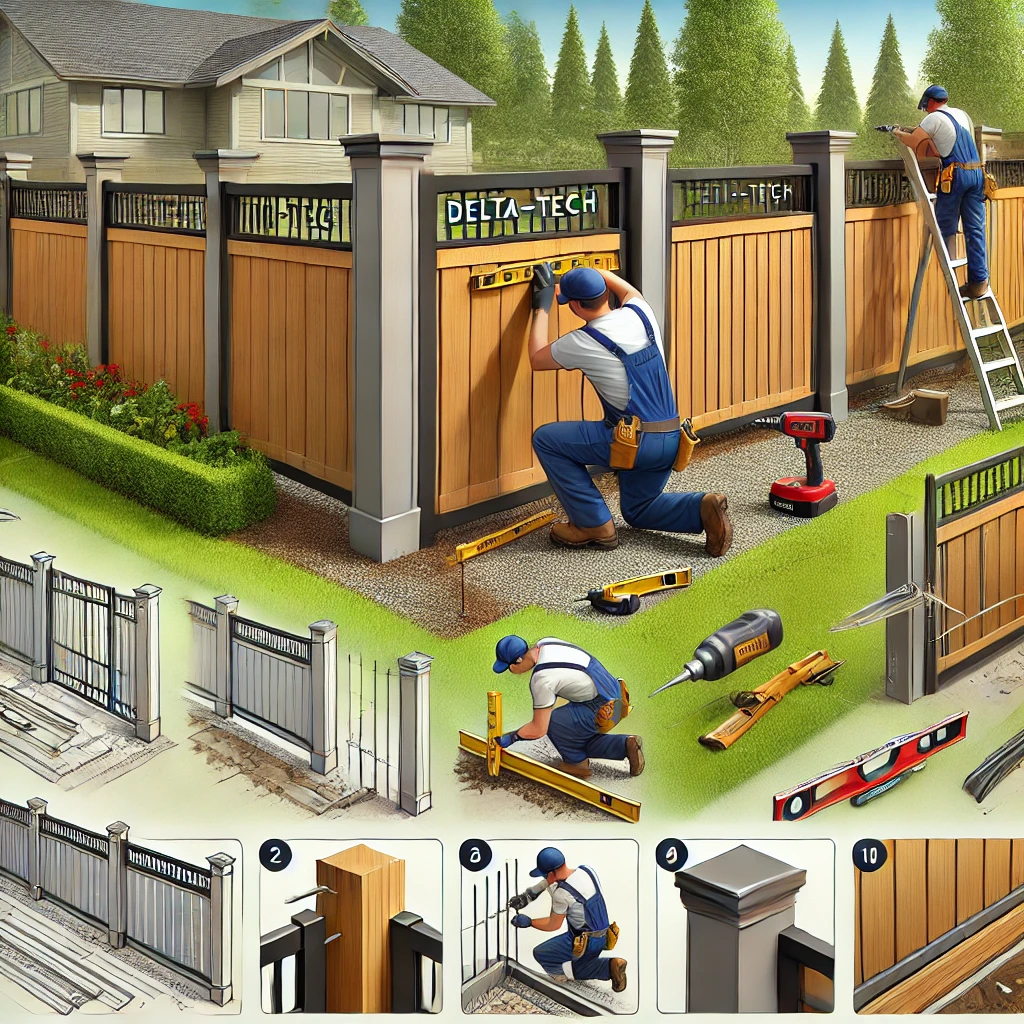
Installing a Delta V-Tech Fence can enhance the security and appearance of your property. Our step-by-step guide provides detailed instructions for a successful installation, whether securing a commercial space or enhancing residential privacy. This guide will cover everything from planning and preparation to setting up the panels and securing the gate. Follow each step carefully to ensure a smooth and durable installation.
1. Planning and Preparation
Gather the Necessary Tools and Materials
For an efficient installation, gather the required tools and materials beforehand. Here’s a list to help you prepare:
- Tools: Drill, tape measure, level, post-hole digger, concrete mixer, hammer, and safety gloves.
- Materials: Delta V-Tech fence panels, fence posts, post caps, concrete, screws, and fasteners.
Understand Local Regulations
Before beginning the installation, consult your local zoning and fencing regulations. Regulations may dictate the fence height, materials, and proximity to property lines. Permits may also be necessary depending on your location.
Mark Your Property Boundaries
Using stakes and string, mark the exact boundary lines for your fence. Ensure that you’re within your property lines and mark where each post hole will be dug. The spacing between posts is typically between 6 and 8 feet, but check Delta V-Tech’s specifications for optimal spacing.
2. Preparing the Fence Posts
Digging Post Holes
- Determine Post Hole Depth: The depth of each post hole should be one-third the height of the fence. For example, a 6-foot fence requires holes at least 2 feet deep.
- Create Holes with a Post Hole Digger: Use a post hole digger to dig a uniform width and depth for each hole. The width should be about 3 times the post’s width for optimal stability.
- Add Gravel Layer for Drainage: Pour a 6-inch layer of gravel into the bottom of each hole to improve drainage and minimize post-rot over time.
Setting Posts in Concrete
- Mix Concrete: Follow the instructions on the concrete mix to ensure it sets correctly.
- Position the Posts: Place a fence post into each hole and ensure it’s centered. Use a level to confirm it is plumb.
- Pour Concrete Around Each Post: Fill each hole with concrete up to a few inches below ground level, then slope the top slightly to direct water away.
- Allow Concrete to Cure: Let the concrete set for at least 24 hours before attaching any panels. Proper curing is essential for a stable fence.
3. Attaching Fence Panels
Aligning Panels with Posts
Once the posts are secure and cured, align the Delta V-Tech fence panels to the posts.
- Position the Panel: Hold the first panel between the two initial posts, ensuring the bottom aligns evenly along the ground.
- Use Level for Accuracy: Ensure the panel is level across and vertically aligned with the posts.
Securing Panels to Posts
- Drill Pilot Holes: To avoid splitting the material, drill pilot holes for each screw that will secure the panel to the posts.
- Attach Panels with Screws: Use the provided screws or fasteners to secure the panel to each post. Ensure each panel is tightly secured to maintain the fence’s structural integrity.
- Continue Along the Fence Line: Repeat these steps with each panel, checking for alignment and level as you go.
Double-Check Panel Stability
After attaching the panels, inspect the entire fence line to confirm stability. Tighten any loose screws and ensure each panel is firmly in place.
4. Installing the Gate
The gate is a critical part of the fence installation as it requires both strength and flexibility for regular use.
Choosing the Gate Position
- Select the Gate’s Location: Decide where the gate will be most functional based on property access points.
- Install Gate Posts: Gate posts require additional stability, so dig slightly deeper holes and reinforce them with extra concrete.
Attaching the Gate
- Position Gate Hinges: Attach hinges to the gate posts at the recommended height according to the Delta V-Tech specifications.
- Attach the Gate to the Posts: Lift the gate and secure it to the hinges, ensuring the bottom aligns evenly with the fence line.
- Install the Latch Mechanism: Follow Delta V-Tech’s instructions to position and attach the gate latch, ensuring it locks securely.
Testing the Gate
Open and close the gate several times to ensure it swings freely without dragging on the ground. Adjust the hinges or latch as necessary to ensure proper functionality.
5. Adding Finishing Touches
Post Caps and Protective Coating
- Attach Post Caps: Securely attach post caps to each post to protect against weathering. Post caps add a finishing touch and protect posts from water damage.
- Apply Protective Coating (if needed): Depending on the material, apply a sealant or protective coating to enhance the durability of the fence, particularly for wooden components.
Inspecting for Security
Conduct a final inspection of the entire fence:
- Ensure all screws and fasteners are tight.
- Check that each panel is stable and that the gate functions properly.
- Adjust any areas where the fence seems loose or unstable.
6. Maintaining Your Delta V-Tech Fence
To keep your Delta V-Tech fence looking great and functioning well, perform routine maintenance. Check for loose screws, inspect the posts for signs of rot or movement, and clean the fence periodically to prevent build-up. For metal fences, consider periodic painting to prevent rust.
By following these detailed instructions, you can enjoy a secure and durable Delta V-Tech fence that enhances your property for years to come.


Leave a Reply