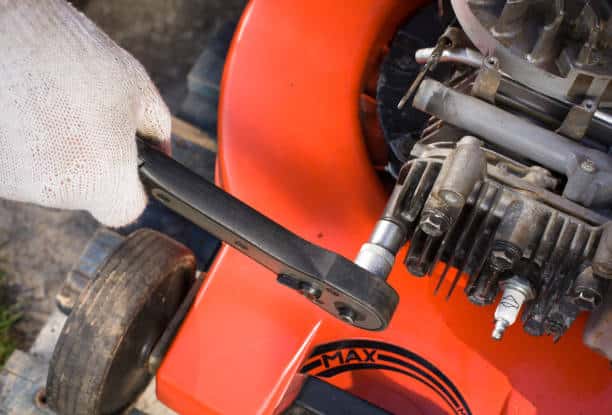
Learn how to replace the drive cable on your Toro lawn mower. Discover signs of cable wear, step-by-step instructions, and the importance of regular maintenance for optimal mower performance.
INTRODUCTION
In Toro lawn mowers, the drive cable is a critical part that is crucial for maneuverability and control during mowing. The driver cable makes the difference between the operator and the mower propulsion system. It gives accurate navigation of different environments and helps cover each part of your lawn effectively after every pass.
Its functionality affects how well the mower works, its responsiveness, and also its user experience generally. For any Toro owner, understanding this information is a must because proper maintenance, as well as timely replacement, are required to maintain the high performance and long life span of these machines. In this article, we will look at ways to replace your drive cables so owners can run their Toro mowers smoothly from season to season.
SIGNS OF A FAULTY DRIVE CABLE
Recognizing signs indicating a faulty drive cable is important in keeping up proactive maintenance measures while avoiding unexpected interruptions when carrying out lawn care activities around one’s home. These are symptoms that may suggest that it is time to replace the drive cable on your Toro lawn mower.
When engaging with the drive system, if the mower does not move forward or backward as expected then it could be an indication that there may be problems with the driving cables.
Slipping or Jerky Movement: When operating the drive controls, jerking motions may occur which implies poor functioning of worn-out driving cables leading to unsteady motion.
Difficulty Engaging Drive System: A stiff or unresponsive lever when trying to engage or disengage drive systems could indicate problems with how effective these devices function.
Excessive Wear or Fraying: Visually examine the length of this line in search of any evidence showing weariness, fraying, and destruction by inspecting its surface properly after loosening 15mm hex nuts holding it together before checking whether such symptoms exist along its entire length where multiple strands can break away due excessive use thereby necessitating immediate replacement process.
Inconsistent Speed Control: In some cases, even after maintaining the same throttle position, a variable speed of the mower may be due to a defective drive cable that causes inconsistent tension and tightness on the propulsion system.
Complete Drive System Failure: This is where there is a complete loss of movement by a lawnmower despite having an engine that is still running thus showing that there might be something wrong with the drive cable or related parts.
By being alert to these signs on Toro mowers, owners can spot developing problems with their drive cables and replace them in time to ensure that their lawn care will not be interrupted.
Replacing a Drive Cable

To change the drive cable in your Toro lawn mower, you should gather the necessary tools and materials required as well as proceed cautiously by ensuring that essential safety precautions are adhered to so that this process goes smoothly without any risks involved.
TOOLS AND MATERIALS REQUIRED:
Replacement Drive Cable: For your Toro model of mower, look for a compatible replacement drive cable. Make sure it fits right into place by either getting its details from its manual or asking someone who deals with Toros for advice on how best one can go about it.
Wrench Set: You will need both standard and metric sizes of spanners when loosening or tightening bolts and nuts during replacement work.
Pliers: These may include normal ones as well as needle-nose types intended to handle small parts like clips retaining cords among others used in attachment purposes.
Screwdriver Set: To remove screws securing various parts of a drivetrain system in your lawn machine, different screwdrivers like Phillips heads plus flatheads will be very helpful.
Lubricant: It is also possible to use other lubricants like penetrating oil spray or silicone spray to help remove and install items and ensure ease of operation of the new drive cable.
Safety Precautions:
Disconnect Spark Plug: Before working on a lawnmower, make sure that you disconnect the spark plug wire to avoid accidental engine starting.
Wear Protective Gear: Use safety goggles, gloves, and closed shoes to guard against cuts from sharp edges or moving parts among others as appropriate protective equipment for personal protection.
Allow Cool Down Period: In case this lawn mower has been used recently; allow some time for the engine and related parts to cool down before replacing it so as not to burn oneself or get injured by hot surfaces.
Secure Mower: Position the machine securely on a flat surface and lock brakes or block wheels while fixing it so that it cannot move accidentally during repair works.
Follow Manufacturer Guidelines: Ensure that you read through Toro mower’s guidebook which provides specific replacement instructions as well as safety precautions on how to change the drive cable thereby sticking to recommended procedures and preventative measures.
Preparing for the Replacement
To prepare yourself effectively for Toro lawnmower drive cable replacement with minimal associated risks, and a positive outcome can be achieved through acquiring the necessary tools, observing the safety precautions specified below:
This is an important step when removing your toro lawn mowers old drive cable before installing a new one. How do I go about removing an old cable? Follow these simple steps;
Disconnect Spark Plug: Disconnect the spark plug wire before any work to prevent the unintended beginning of the engine from running
Access the Drive Cable Assembly: Find where your Toro lawn mower’s drive cable assembly is located which may entail removals of all covers obstructing access to its’ drive system components
Identify Cable Attachments: Note how this old drive cable is connected within the mover’s transmitting mechanism; usually, there is a handle at your side that runs up until linkages or axle assembly before being fastened.
Release Cable Tension: When the drive control lever; stretch it out and then let go of any tension that it might be holding onto the cable. This makes the cable easier to handle.
Disconnect Cable Ends: You may use pliers, a wrench, or any other tool for loosening and removing retaining nuts, bolts, or clips that hold one end of the drive cable at its transmission or drive axle assemblies but this should be done carefully to avoid misplacing washers/spacers accompanying such bolts
Free Cable from Guides and Brackets: Carefully pull off all cord’s old guides/breakers along which it was routed. Remember the way of routing the cable as will help know how to put in a new cable later on.
Remove Cable from Handle Assembly: Apart from screws nuts may also need to be removed when detaching this other end of your lawn mowers drive wire from its handle assembly or control lever etc.
Inspect for Damage: Do not forget to check if there is any damage, wear-out or rotting on this old power belt once you have taken it off completely from its position. This survey will guide you on whether to replace it or see if anything else has gone wrong with your lawnmower’s engine section.
Dispose of Old Cable: Now dispose of properly used Toro lawnmower cables since these are according to local garbage disposal rules.
In this way, you can remove the old drive cable from your Toro lawn mower and install a new one so that it can function well.
Installing the New Drive Cable
The smooth operation and maneuverability of the Toro lawn mower require the installation of a new drive cable. Here is how to install it successfully:
Choose the Right Replacement Cable: Make sure that the Toro lawn mower model is compatible with the new drive cable. Check in the machine’s handbook or consult a Toro dealer for more information.
Prepare Mower: Make sure you put it on an even surface, engage the parking brake, and pull out its spark plug wire for safety reasons.
Access Drive Cable Assembly: Take off any covers or panels that hinder access to drive system components. Find out where exactly the drive cable assembly is located and specify areas where attachment points of new cables can be found.
Route New Cable: Start by routing your brand-new drive cable along the same route as the old one had been following any guides or brackets that are offered. There should be no twists and kinks in its course that may stop its movement.
Connect Cable Ends: Link one end of your replacement drive cable to the transmission or drive axle assembly securing it using the right nuts, bolts, or clips. Fasten these fixtures with pliers or spanners tightly enough.
Attach a Handle Assembly to Cable: In case there is any other side of your handle assembly that should get connected with this driving cord, do so accordingly if possible. Position those screws, nuts, or other fasteners securely into place at the designated attaching points within the connection line of such wires.
Adjust Tension on Cables – See owner’s manual for instructions specific to your lawnmower on tension adjustments required for correct operation of the drivetrain system using newly installed cables
Test Drive System – With new cables fitted, test whether the mower’s movement would start functioning when you turn on its control keys (drive) observing if it has responded properly after engaging those device controls
Ensure Cable Routing Is Properly Fixed: After you have successfully fixed the new drive cable, make sure it is properly placed in any braces or guides along its length to be safe. There should be no sharp bends or pinching that could ruin its performance and longevity.
Reassemble Components: Re-install and firmly attach all covers or panels removed for accessing the drive cable holders
In this way, you can install a new drive cable on your Toro lawn mower that will work perfectly during lawn maintenance activities.
Testing the Drive System
After installing a new drive cable on your Toro lawn mower, it is important to carry out an extensive test of the drive system to ensure proper installation and functionality. Here are the steps to take when testing the drive system:
Prepare Mower: Place the machine on a level surface and engage the parking brake. Make sure that its spark plug wire is disconnected so as not to start accidentally.
Start Engine: Based on what the manufacturer says about how starting an engine of a lawnmower ought to be done, go ahead with it accordingly; wait for some time before checking how well the drivetrains function through this unit alone once warmed up a bit.
Get the Drive Controls Engaged: The mower’s propulsion system could be put on by getting the engine running and engaging the drive controls. Depending on your Toro model, this may involve pressing a lever or engaging a drive engagement switch.
Examine Forward Motion: Gradually increase throttle while the forward motion is observed. When the drive controls are engaged, then the mower should move smoothly and steadily in the forward direction.
Check Reverse Movement (if possible): Should you have a Toro lawnmower that has reverse capabilities, activate its appropriate controls to prove reverse movement. The lawn mover should go backward effortlessly and constantly once reversal controls are activated.
Ensure Smoothness of Operation: If there is anything wrong with its operation while moving it either forward or backward, don’t ignore it. It should be noted that if there is no jerking or hesitation, then this will mean that your machine’s drive system has been properly engaged.
Prove Speed Control; Change the throttle setting to see what happens to the speed of your machine as you do so. The speed should vary linearly on throttle input without jumps.
Test Steering Responsiveness: Confirm whether the mower can still be controlled during driving tests without any delays in steering response at all times. Promptness in responding to steering inputs shows there are no excessive resistances when turning left or right.
Look for Leaks or Odd Noises: Visually check for signs of leaks or strange sounds as you test-drive because these indicate issues with fluid levels/leakages from motor components that steer mowers themselves.
Repeat Tests As Necessary: Conduct multiple iterations of this operation until you have consistent results and detect any inconsistencies requiring further adjustments.
By following these instructions and thoroughly testing the drive system, a new drive cable installed on your Toro lawn mower can be confirmed as having been done properly providing confidence in its future performance. If during testing any issues arise that seem unusual consult the manual for further assistance from experts
Conclusion
In conclusion, maintaining the drive cable of your Toro lawn mower is essential for ensuring optimal performance and longevity of your equipment. Equally important is the role played by the drive cable in ensuring smooth movement as well as control when doing various gardening activities thus enabling efficient navigation over different kinds of grounds. This way, owners of this Toro machine can save on any unexpected breakdowns that may result from costly fixes and hence prolong its serviceable life.
There are several benefits to replacing the drive cable at the first sign of wear or deterioration. A replacement restores responsiveness and reliability to the mower’s drive system resulting into uniform functionality and ease while using it. Additionally, a functionally operative drive cable enhances safety by guaranteeing precise handling over lawn mover movements reducing risks of occurrences and misfortunes during applications thereon. Furthermore, regular servicing and prompt changing out of drive cables contribute directly to longevity in general equipment life preserving investment worthiness and minimizing time.
A proactive way of maintaining the performance and efficiency of your Toro equipment is by incorporating drive cable maintenance into your routine lawn mower care regimen. If they are watchful for signs of drive cable wear and take timely action, Toro mower owners can expect several years of dependable service and beautiful lawns. After all, a well-maintained drive cable is the backbone of a smoothly running Toro lawn mower that enables you to approach gardening chores with confidence and ease year in year out.
FAQs
Sure! Below are some frequently asked questions (FAQs) regarding the replacement of the drive cable in a Toro lawn mower:
How often should I replace the drive cable on my Toro lawn mower?
The frequency at which the drive cables should be replaced depends on several factors including usage intensity, environmental conditions as well as maintaining practices. In general, it is important to regularly check for any signs of wear or damage on the drive cables so that they can be replaced when necessary.
Can I replace this myself or will I need a professional’s help?
While an individual who has basic mechanical knowledge and tools may do it themselves, others may prefer hiring professionals to avoid any complications or doubts about how it should be done. Following manufacturer guidelines and safety precautions is essential to ensure a successful replacement.
What happens if I don’t change out worn-out drive cables?
Failure to exchange worn-out or damaged drive cables could lead to various problems such as propulsion loss, erratic movement, or even dangerous situations when operating them. Furthermore, continued use with a faulty driveshaft might also cause further damage in other parts of the drivetrain system possibly resulting in major repairs or premature failures.
Is there a way for me to tell if my Toro lawn mower’s propulsion issues are a result of its drive cable?
If you have any issues with its propelling mechanism like difficulty moving forward/backward, uneven movements, or failure to engage then it is more likely because of its driving belt. Examine this part closely to see if there is any wear or breakage that may necessitate its replacement.
Are there preventative maintenance measures to extend the life of a drive cable?
To ensure that the drive cable lasts longer, regular maintenance practices include keeping it clean and free from debris, oiling moving parts as advised by the manufacturer, and when not in use storing the mower in a sheltered dry place. Also, do not overload it or subject it to too much stress during operation.


Leave a Reply